You can install the Pipedream Salesforce app in the Accounts section of your Pipedream account, or directly in a workflow.
In order to use this application, you must be on a Salesforce Edition that has API Access, and API Access must be enabled. See here for more details.
Salesforce Editions with API Access
- Enterprise Edition
- Unlimited Edition
- Developer Edition
- Performance Edition
- Professional Edition (API access available as an add-on)
Your Salesforce user needs a System Administrator profile in order to enable API access. If you don't have this on your Salesforce Profile, ask your System Administrator to enable API Access for your user.
The most straightforward way to add these permissions is to create a new Permission Set in Salesforce, and to add it to the user once created.
Here is a step-by-step on how to do this:
Create New Permission Set
- Navigate to your Salesforce instance, and click the Setup wheel in the top-right corner.
- Under the Administration tab on the lefthand sidebar, click Users --> Permission Sets.
- On the Permissions Set page, click New.
- Create a new permission set, give it a label, API name, and description. Example:
Label: Pipedream API Access API Name: Pipedream Description: Adds a set of permissions required for Pipedream.

Add Permissions
- Now that the permission set is created, navigate to System Permissions.

- From System Permissions, click Edit.

- Select the following permission, and click Save.
- API Enabled
If you'd like to utilize Pipedream's webhook triggers, you will need to add the following permissions to the permissions set as well:
- Apex REST Services
- Author Apex
- View Roles and Role Hierarchy
- Modify Metadata Through Metadata API Functions
- View Setup and Configuration

- The list of added permissions (6) should look like this, and click save again.

Add Permission Set to User
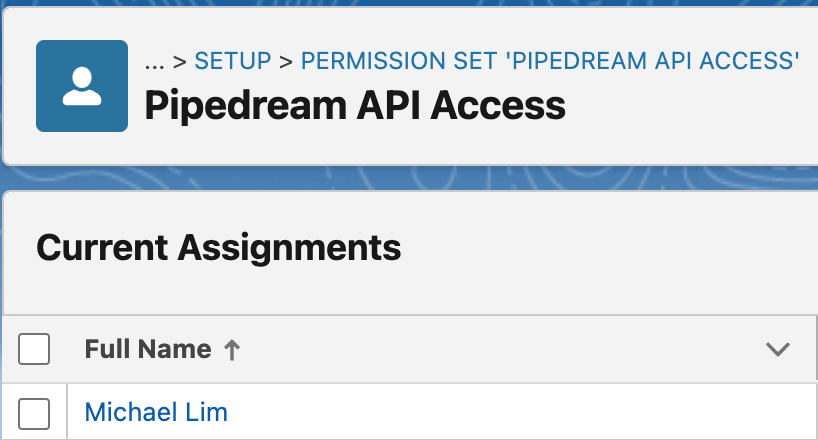
- From the newly created Permission Set, click Manage Assignments, then Add Assignment.

- Select the user you'd like to assign this permission set to, and click Assign. The user should now show up under Current Assignments.
- You should now be able to use the Salesforce integration along with the webhook triggers if you configured the required permissions above.
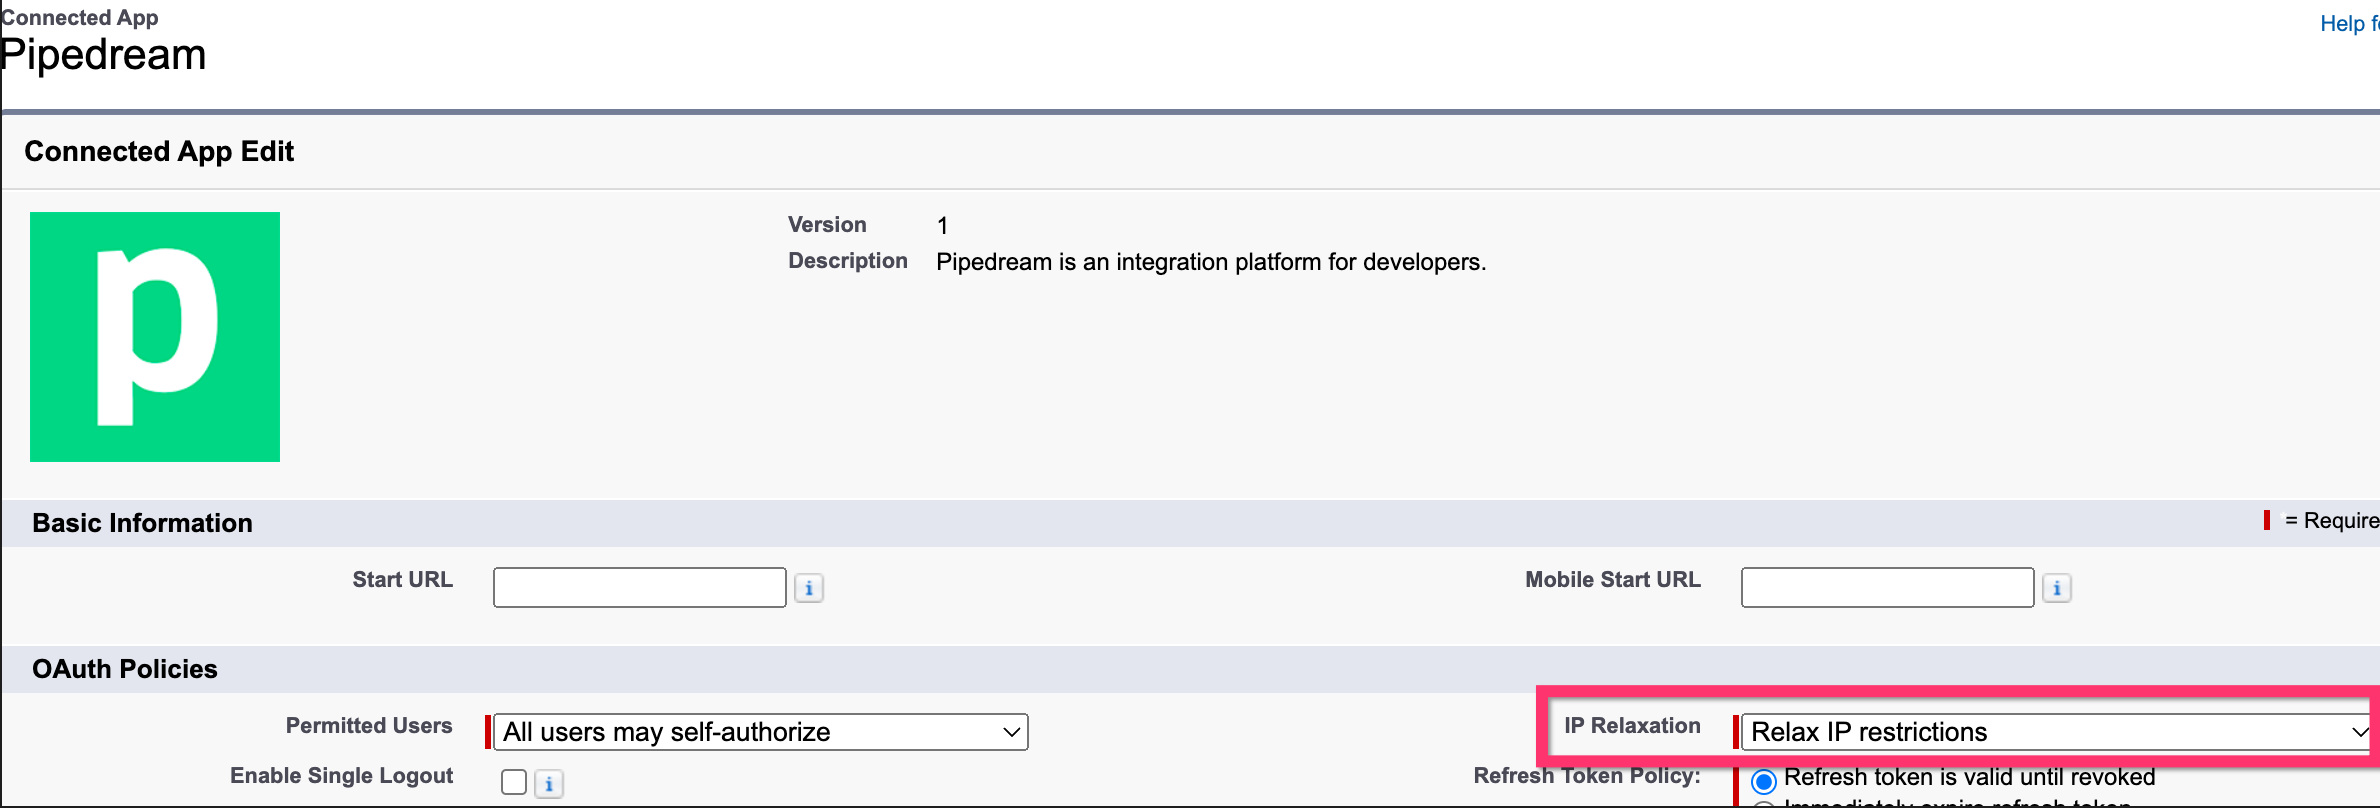
If you're having issues connecting your Salesforce account on Pipedream, please ensure that IP Restrictions are not enabled for Pipedream. To learn more about what this means, please see the Salesforce documentation here.
To modify these settings:
- Navigate to Salesforce Setup.
- Under Apps, click Connected Apps, then Connected Apps OAuth Usage.

- If Pipedream is not yet installed, click Install, otherwise click Manage App Policies.
- Click Edit Policies.
- Under OAuth Policies, you should see the setting IP Relaxation. Set this to Relax IP Restrictions.
If you happen to stumble on the error: UNKNOWN_EXCEPTION: admin operation already in progress when creating an Instant trigger, you can follow the steps below to use the Salesforce Flow Builder to be able to use webhooks with Pipedream. This is a known error in Salesforce.
- Create a New Workflow on Pipedream and add a HTTP trigger.
- Login and go to your Salesforce Setup Menu Page.
- On the left hand Quick Find Bar, search for Outbound Messages in Process Automation -> Workflow Actions.
- Click on the New Outbound Message button in the middle of the page.
- Select the Object Type and click Next.
- Fill in the Name, Unique Name, and Available Fields to Send fields in the form. On the Endpoint URL field, paste the URL endpoint generated by the HTTP trigger created earlier and then click Save.
- Back to the left hand Quick Find Bar, search for Flows in Process Automation.
- Click on New Flow button on the upper right hand corner and then select on Record-Trigged Flow and click on Create.
- Select the same Object Type as before and select the appropriate flow trigger.
- Optionally set Entry Conditions, keep Actions and Related Records selected, and click on Done.
- Click on the plus sign below the newly created trigger and click on Action.
- Search for Outbound Message and on the search bar select the trigger that was created previously.
- Insert a Label and an API Name and then click on Done.
- Save the flow by clicking on the Save button, insert a Flow Label and a Flow API Name and then click on Activate next to the Save button.
- Back to the Pipedream Workflow, create a new step with the Salesforce Convert SOAP Object action.
- In the XML Soap Object field, select the path from the trigger or type in
{{steps.trigger.event.body}}. - That's it! You can now deploy the workflow and you will receive instant updates from Salesforce.