


![]()
![]()
domoja
A Typescript framework for home automation
Introduction
This framework allows to create home automation applications.
The server part is written in Typescript, while the GUI uses Angular and Ionic.
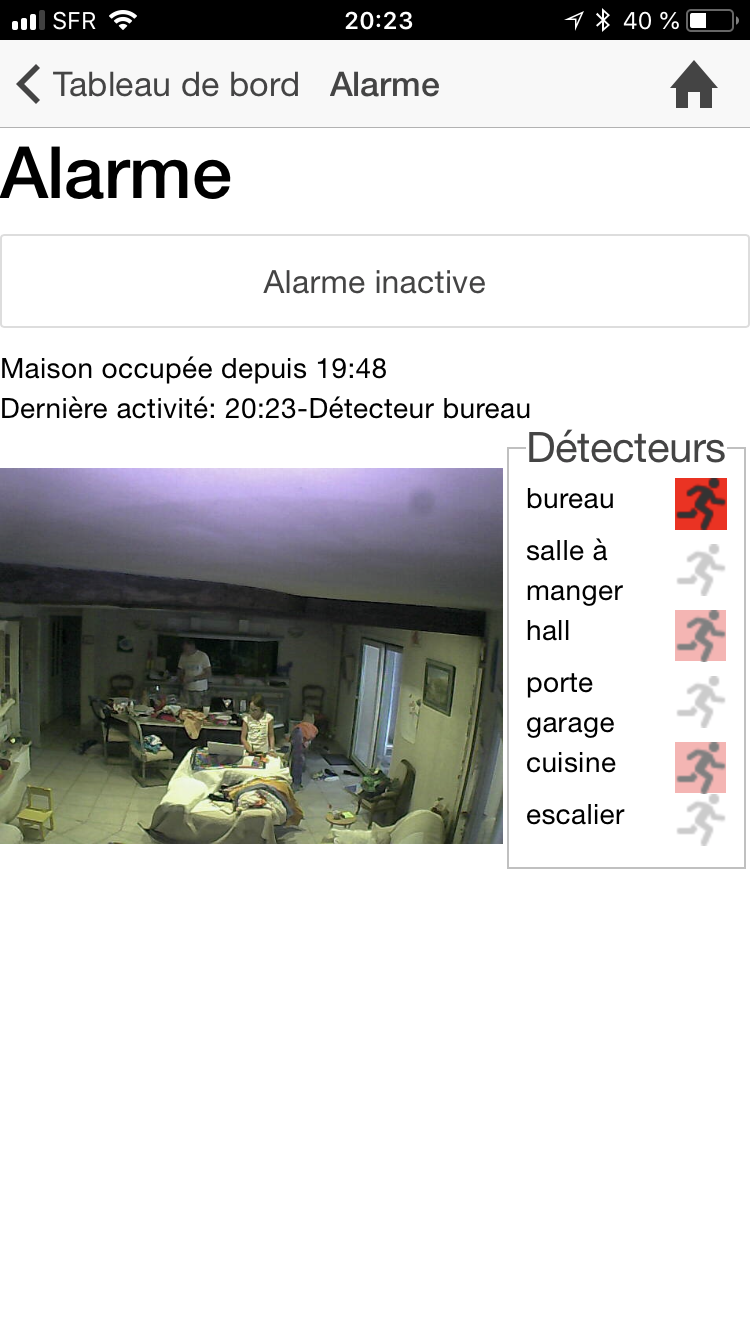
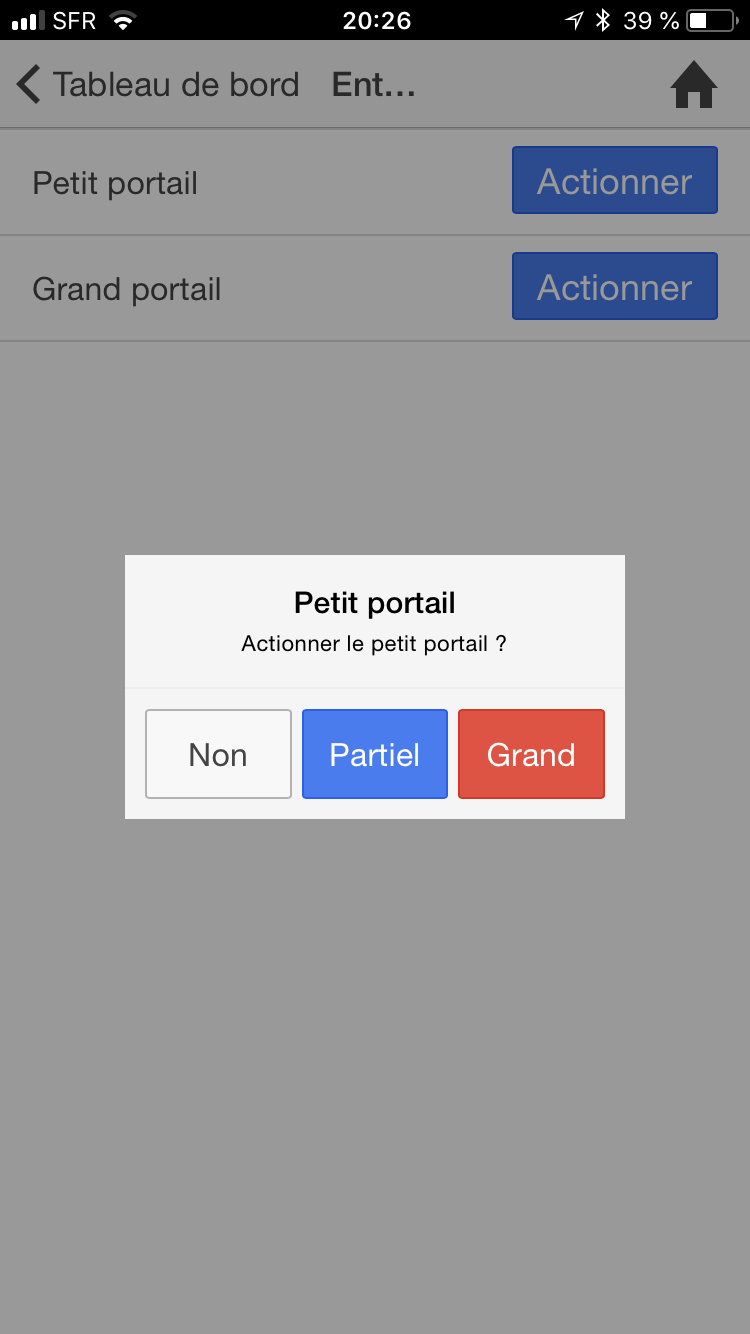
Here are some screenshots of the application:


Installation
# install domoja and domoja-core
$ yarn add domoja domoja-core

# install tempo and proxiti modules to run the demo
$ yarn add domoja-tempo domoja-proxiti

# run the demo on http://localhost:8700
$ yarn domoja -p 8700 --dev
Concepts
Domoja collects information from and interacts with devices through sources. You can think of sources as sources of information.
Sources
A source provides information about, and allows controlling a certain set of devices.
To use a source, it is necessary to load its type in Domoja. Some source types are predefined in Domoja, some others can be add by extension modules:
$ yarn add domoja-<source-module>
Once loaded in Domoja, the module providing the source type needs to be imported in the configuration before a source of this type can be declared and then referenced by a device.
The example below shows how to create the source myAstronomy of type astronomy from the module proxity, to get the sunrise time:
$ yarn add domoja-proxiti
imports:
  - module: proxiti
    source: astronomy

sources:
  - myAstronomy: {
      type: astronomy,
      location: "06030"
  }

devices:
  - sunrise: { type: device, widget: text, tags: 'astronomyTag', source: myAstronomy, id: sunriseTime, name: "Lever du soleil" }
| Source type | Module | Description |
|---|---|---|
| astronomy | proxiti | This source provides astronomy information from http://www.proxiti.info/horaires_soleil.php?o=06030 This includes sunset, sunrise, dawn, dusk, zenith times, and day duration, at a specific location. Parameters:
|
| command | core/sources/command | Source implemented with shell commands:
ON and OFF :the optional parameter pushupdates is a shell command executed once as a daemon at the creation of the source
available variables are:
|
| Freebox | freebox | |
| IPX800 | ipx800 | This source connects to IPX800 devices from GCE Electronics. Example:
|
| Mqtt | mqtt | |
| Openzwave | openzwave | Domoja source to connect to ZWave devices Example:
|
| Sample | sample | A source derives from the Source class and implements the following methods:
|
| tempo | tempo | Cette source récupère les informations de couleur de période auprès de l'EDF, pour le jour courant et le lendemain. Exemple:
|
| VoiceByGoogle | voice-google | |
| Zibase | zibase | This source connects to a Zibase device. Not used anymore as Zodianet company is now dead for years... |
Devices
The framework supports a range of devices:
- device: a generic device with attributes which can be set or get.
- relay: a particular switch, for which delays can be configured.
- variable: a special device that contains a value which can be read or written.
Modules
Domoja can be extended through modules, to add new sources, devices, etc. They are essentially npm modules following particular specifications:
- their name must start with
domoja- - they must derive from
domoModule
Available modules
The following modules are currently available:
- domoja-core: Core components of Domoja
- domoja-freebox: The Freebox domoja module
- domoja-ipx800: IPX800 source for Domoja
- domoja-mqtt: The Freebox domoja module
- domoja-openzwave: Openzwave source for Domoja
- domoja-proxiti: Astronomy source for Domoja from http://www.proxiti.info/
- domoja-sample: A sample Domoja module skeleton
- domoja-tempo: EDF Tempo information for Domoja from https://particulier.edf.fr/fr/accueil/contrat-et-conso/options/ejp.html
- domoja-voice-google: Allows Domoja to speak, thanks to Google
- domoja-zibase: ZiBase source for Domoja
Adding a new module
Before importing a module in the config file, you need to make it available. In the domoja directory, use yarn add <themodule>.
If you are developing the module, you might want to add it linked:
$ cd <themodule_dir>
$ yarn link
$ cd <domoja_dir>
$ yarn link <themodule>
How to develop a new module
Developers can develop new Domoja modules. For this, proceed this way:
- Copy the
domoja/modules/samplerepository. - Update
package.json. Note that the module name must start withdomoja- - You can find in
sources/sample.tsa sample source, - Link your module using
cd <yourmodule_dir>; yarn linkandcd <domoja_dir>; yarn link "domoja-<yourmodule>" - You can now import your module from the config file.
It can be convenient to setup a small test file and run it with nodemon. This will make it possible to automatically restart the test execution when the module source is modified, and also to debug with Chrome for instance.
Example: File test_module.ts:
import { MyModule } from 'domoja-samplemodule';

let freebox = new MyClass('path', 'some', 'parameters');
and run it with:
nodemon --ext ts --watch test-module.ts --watch <module_dir> --exec node --inspect=0.0.0.0 --require ts-node/register test-module.ts
API
Domoja provides a REST/JSON api, which is available through Swagger at /api-docs.
- GET /app: Retrieve the app data
- POST /app/demo-mode: Set the app demo mode
- GET /devices: Retrieves the list of devices
- GET /devices/{id}: Retrieves a device
- POST /devices/{id}: Sends a command to a device
- GET /devices/{id}/snapshot: Get a snapshot from a camera device
- GET /devices/{id}/stream: Get a stream from a camera device
- GET /devices/{id}/history: Get the history of a device
- GET /pages: Retrieves the list of pages
Persistence
Device states can be persisted using MongoDB. By default, all states that are numbers are persisted.
Persistence can be specified through the persistence attribute:
persistence: "<persistence-module>:<id>:0:<aggregation mode>:<keep>"
-
<persistence-module>ismongoby default. -
<id>specifies the id of the device to be persisted. If not specified, then the path of the device is used. Specifying the id is useful if you want to be sure to keep the persisted states even if you change the path of the device. -
<aggregation mode>: one ofyear,month,day,hour,minute,none -
<keep>: duration to persist the states, in seconds.
User Interface
Domoja comes with a generic user interface based on Ionic. The files are located in the www directory, and generated by domoja-ui.
HomeKit and Siri integration
Domoja can be easily integrated with HomeKit through the great homebridge. Once Homebridge is installed, the best is to create an API key. Then you can add accessories in homebridge's config.json file.
Example for a switch:
{
      "accessory": "HTTP-SWITCH",
      "name": "Lampe préau",
      "switchType": "stateful",
      "pullInterval": 5000,
      "onUrl": {
        "url": "https://XXX/devices/lampes.lampe_preau",
        "method": "POST",
        "body": "command=ON",
        "auth": {
          "username": "XX",
          "password": "XX"
        },
        "headers": {
          "Content-Type": "application/x-www-form-urlencoded"
        }
      },
      "offUrl": {
        "url": "https://XXX/devices/lampes.lampe_preau",
        "method": "POST",
        "body": "command=OFF",
        "auth": {
          "username": "XX",
          "password": "XX"
        },
        "headers": {
          "Content-Type": "application/x-www-form-urlencoded"
        }
      },
      "statusUrl": {
        "url": "https://XXX/devices/lampes.lampe_preau",
        "method": "GET",
        "auth": {
          "username": "XX",
          "password": "XX"
        }
      },
      "statusPattern": "\"ON\""
    }
Example for a sensor:
    {
      "accessory": "HTTP-TEMPERATURE",
      "name": "Température piscine",
      "debug": 1,
      "getUrl": {
        "url": "https://XXX/devices/piscine.temperature",
        "method": "GET",
        "auth": {
          "username": "XX",
          "password": "XX"
        }
      },
      "statusPattern": ".*\"state\":\"\\+?(-?[0-9]+\\.[0-9]*)\"",
      "patternGroupToExtract": 1
    },
Siri is then available on iOS through the Home application.
Development
To test a new domoja package, create it through yarn pack and install it:
$ cd domoja
$ yarn pack --filename /tmp/domoja.$RANDOM.tar.gz


$ cd ../domoja-run
yarn add $(ls -t /tmp/domoja.*.tar.gz | head -1)
To do
- Use KEEP for persistence
- Ajouter un status general couplé avec Siri: "donne moi le statut de la maison/piscine/tondeuse..."
- support other attribute than 'state' in devices // normalement ca marche (ex tem avec temp piscine). L'utiliser pour le stick etc
- support for dev: reload module when changed
- authentication cookies seem not persisted: when restarting the server, we need to relogin
- debugMode should be taken into account when creating the source
Issues
- on config reload it seems that we get mongodb drain
- sur iOS revenir sur l'app ne fonctionne pas toujours
- lumieres clignotantes a fixer
Fixed
- en cas de script timeout on n'a plus de logging info ?!?! -> https://github.com/patriksimek/vm2/issues/306