author: Daan Kets daankets@blackbit.be version: 1.1.3 title: HomeBridge UniPi Plugin for Evok API
About this plugin
This library provides a homebridge platform plugin for the UniPi Neuron series of devices. Although the Neuron devices come with a set of supported software, they are not HomeKit compatible. It is possible to expose them to HomeKit via third party domotics platoforms, but that still requires you to do quite a bit of manual configuration and tweaking.
The purpose of this plugin library is to expose all (or as much as possible) of the default features of a UniPi device as a single HomeKit Accessory with automatically detected services for all of the features. I also added some extras...
 Copyright & Source: UniPi.technology - With permission from the copyright owner
Plugin Requirements
The plugin is stable enough for production use. It requires:
- On the homebridge device:
- the latest version (4.50) of Homebridge,
- Node 12.x,
- the latest version (5.40) of
unipi-firmware(installed and applied)
- On the UniPi Neuron device
- Version 2.1.8 of the
evokpacakge installed, and exposed to the homebridge device (see config). - Version 1.36.1.20190819 of the
neuron-kernelpackage - Version 1.20190819 of the
raspberrypi-kernelpackage
- Version 2.1.8 of the
Note
Since iOS 13, the different sub accessories will appear grouped as one single UniPi accessory. I'm working on a next release, that will expose the devices in a different way.
History
1.1.3
The watchdog now works in a different way, and will toggle the first user led every 3 seconds in order to test the connection. The watchdog will reset the websocket connection to the Evok api after 5 missed events.
1.1.2
Resoves a dependency issue, and fixed an issue with stuck inputs (disables repeat after a set max repeat count).
1.1.1
Fixes a minor bug with the first release.
1.0.0
First public release
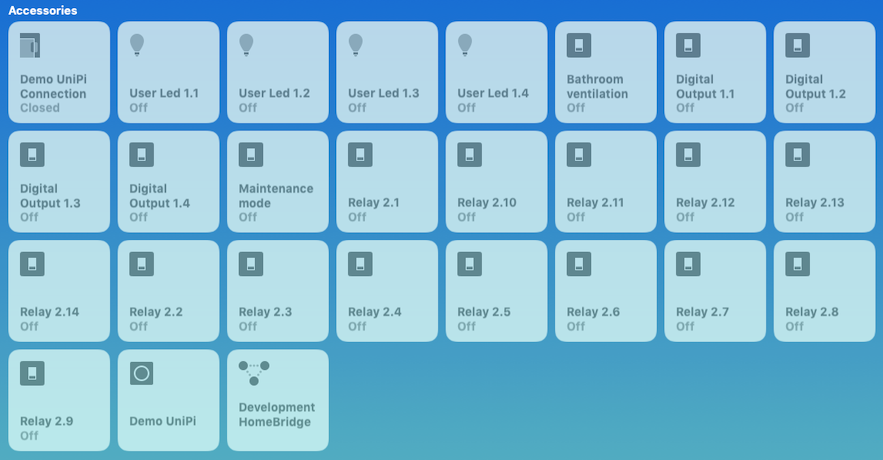
Screenshot
Supported features
State preservation
The plugin supports preservation of device state accross plugin or homebridge restarts and reconnects. Upon startup, the plugin will restore the current device state, instead of propagating default values to the devices.
Connection state tracking - virtual contact sensor
Due to HomeKit no longer supporting the 'Reachability' characteristic, i've added an optional (configurable) contact sensor to indicate the connection state to the Evok API.
Whenever the plugin get's disconnected from the Evok API (due to UniPi changing IP or rebooting etc.) the contact sensor state will change to open (which is the warning state). This way, it is possible to respond using automation as well.
Multiple devices
The plugin supports multiple UniPi/Evok endpoints, with separate configuration.
Maintenance mode
The plugin exposes a 'maintenance mode' virtual switch. Setting the maintenance mode will allow you to do the following things:
- Trigger pulse timers without updating the associated virtual impulse relay (for correcting the impuls relay state if it is wrong)
- Manually change a virtual pulse relay's state, without triggering the corresponding digital output, for the same reasons as above.
Built-in switching rules
As of version 1.1.0, it is possible to define switching rules for input digital input events in the system, by adding a set of rules to your configuration. These rules process a bit faster than the Homekit rules, also work when your homekit hub is offline, and are faster to define (and preserved if your HomeKit environment ever has an accidental reset).
Example
Note that the entire "rules" section is optional and per 'unipi endpoint'.
Detection of stuck push buttons
As of version 1.1.1, it is possible to stop raising repeated 'long-press' events as of a specific repeat count (defaults to 10). This is mainly to prevent devices from breaking (pulse relays or lights or …) due to many repeated switches.
Configuration
Global configuration (for all inputs) is possible (10 by default), as well as per-input configuration.
Note that the entire "inputs" section is optional, and per 'unipi endpoint'.
Supported UniPI Services
Digital inputs
The digital inputs of the UniPi devices are detected automatically, and exposed as Programmable Stateless Switches by default. They support SINGLE, DOUBLE and LONG press events, and can be used to trigger automations. The long press events will repeat if you keep pressing the button linked to the digital input.
Note For the double press feature to work properly, you may need to tweak the debounce value for the digital inputs to a value that suits your montary switches. You can do that via the Evok UI, in the Configuration tab. Otherwise, you may miss a some double click events, as the down event won't be seen.
==TODO== I intend to allow for further configuration, in order to support both stateless and stateful (on/off) switches.
Digital & Physical relay outputs
Both the digital (Transistor) and physical relay outputs of the UniPi devices are detected automatically, and exposed as switches. They can be reconfigured within the iOS App as lights or fans.
Extra: Relay Timers
The relay outputs can be linked to a 'timer'. In that case, when the ouput is switched on, the timer will start, and turn the output off again after a configurable delay (unless otherwise switched off before that delay). The timer can be set to a very short time, like 250 ms, in order to provide a 'pulse' to for example an external impulse relay.
Note Timers are also activated when a relay output is triggered from outside HomeKit (Evok or another channel)
Extra: Virtual Impulse Relay
Sometimes, you'll want to use a relay output to trigger another external relay. If this relay is an impulse relay, it will not require a constant current to keep the relay closed. Instead, a short pulse to make it change state is sufficient. This poses one problem: the trigger output will change back to off state, and you won't be able to see if the triggered relay is in 'on' or 'off' state. Enter 'virtual impulse relays'.
When setting up a a timer with a very short 'pulse' timeout, you can add the property "pulse": true, and an optional property "name": "whatever". In that case the timer will construct an additional virtual impulse relay (switch service), that will toggle on and off automatically whenever the relay linked to the timer is switched on. This will allows you to track the on-off state of the impulse relay, provided that the initial state is correct. If not, you can manually correct the state.
When you directly change the state of a virtual impulse relay in the Home app, it will automatically trigger the linked relay output and therefore effectively change the device state (unless in maintenance mode). This way, you can directly interact with the virtual device, instead of via the triggering output.
The below diagram demonstrates the sequence of this flow.
Home App -> Virtual Relay 2.1: TOGGLEVirtual Relay 2.1 -> Timer 2.1: IGNORE NEXT TOGGLEVirtual Relay 2.1 -> UniPi: SET RO 2.1 ONVirtual Relay 2.1 --> Home App: TOGGLEDUniPi -> External Impulse Relay: PULSEExternal Impulse Relay -> External Impulse Relay: TOGGLEUniPi --> Relay 2.1: IS ONRelay 2.1 -> Timer 2.1: STARTRelay 2.1 -> Timer 2.1: TOGGLE (IGNORED)Timer 2.1 -> Timer 2.1: TIMEOUTTimer 2.1 -> Relay 2.1: SET OFFRelay 2.1 -> UniPi: SET RO 2.1 OFFUniPi --> Relay 2.1: IS OFFUser leds
The UniPi has 4 user accessible LED's (X1 to X4). These user leds are detected automatically, and exposed as light bulbs with on/off state. User LED X1 is used during the Home App's device identification process, where it will rapidly blink 20 times.
Extra: Virtual 'Connection' contact sensor
You can configure an additional virtual contact sensor service to expose the connection status of the Evok API. This way, it is possible to respond
Updates to device states
The device states are updated automatically when changed by an external event (for example a user manually using the evok API).
Installation
Installation is very straightforward, and it is possible to configure more than one Neuron device.
-
Create a homebridge user
# We're creating a system user in this case, but with a home directory!sudo useradd -r -s /bin/bash -d /var/lib/homebridge -m -c "HomeBridge User" homebridge -
Become the homebridge user, and create the necessary configuration.
# Switch userssudo -i -u homebridge# Make the .homebridge foldermkdir .homebridge# Create and edit the configuration file (see below)vi .homebridge/config.json# Return to your own userexit -
Install homebridge globally
sudo npm -g install homebridge- Install the plugin globally
sudo npm -g install homebridge-unipi- If you didn't do so before, edit your
/var/lib/homebridge/.homebridge/config.json, and add a platform in theplatformsarray:
Note: ALL parameters except the name are optional. The values above show the defaults, except for the host. The default host is localhost (HomeBridge running on the UniPi device).
The above example exposes 2 timers. The first one is a classical timer that will turn off the physical relay 2.9 after 120000 ms (2 min). The second one is a pulse timer that will turn off the digital output 1.4 after 200 ms (a short pulse). The output will however trigger a virtual pulse relay (switch) for the bathroom ventilation. With every pulse, that relay will toggle state, allowing you to track the 'Bathroom ventilation' switch.
Note
If you do NOT install homebridge on the UniPi device, you must configure the Evok API to listen on another address than 127.0.0.1 or ::1. You can change this in the nginx configuration on the UniPi.
Startup
I recommend starting HomeBridge using a Systemd Service unit if supported by your OS.
Edit /etc/default/homebridge
# Override data dir
# HOMEBRIDGE_OPTS=-U /var/lib/homebridge/.homebridge

# Uncomment to enable debug mode
# DEBUG=*
Edit /etc/systemd/system/homebridge.service
[Unit]Description = HomeBridge Service [Service]Type = simple # Run as the homebridge userUser = homebridge # Set env variables in the below fileEnvironmentFile = /etc/default/homebridge # Start homebridge with env $HOMEBRIDGE_OPTS from env fileExecStart = /usr/local/bin/homebridge $HOMEBRIDGE_OPTS Restart = on-failureRestartSec = 10KillMode = process [Install]WantedBy = multi-user.targetRun sudo systemctl daemon-reload && sudo systemctl enable homebridge.service && sudo systemctl start homebridge to enable and start homebridge.
Run sudo journalctl -u homebridge to view the logging.
Updates
In order to update either HomeBridge or the plugin, simply execute:
# Update all globally installed npm libraries sudo npm -g install npm && sudo npm -g install homebridge-unipi # If updated, restart homebridge sudo systemctl restart homebridgeLicense & Copyright
The software is released under the LGPLv3, and copyrighted ©2018 by Daan Kets.