Smartthings and SMS Remote control for Outlander PHEV
SMS and Smartthings application wrapper over phevctl


Features:
- can work over sms without smartthings
- receive PHEV errors over SMS
- receive Theft Alarm Notifications (if the theft alarm is enabled in the ETACS )
- switch on/off condition/heater
- receive warning message from the remote EV and send it in push Notification.
- send Notification "Pre A/C has stopped. Possible causes of this are as follows: Door is Open. Main battery level is Low. Drive Battery temperature is Low."
- change mode of air conditioner: heater/cool/windscreen for 10/20/30 mins,
- show battery level
- support google home
- check if doors are closed
- Thermostat Operating State
- Support SMS if use mikrotik LTE/huawei e3372h-320(CL4E3372HM)
- support wifi EVSE (Electric Vehicle (EV) Charging Stations)
- SMS commands
comparison of installation types
| Installation Type | Execute action(heating/cooling/headlights and etc...) | Smartthings Hub required | Internet connection required | can send/receive SMS | huawei e3372h-320(CL4E3372HM) / MikroTik LtAP mini LTE kit | Raspberry Pi must be installed | Send Push Notifications |
|---|---|---|---|---|---|---|---|
| Cloud Installation (run smartthings-phevctl on the cloud) | Immediately | No | Yes | No | Yes | No | Yes |
| Cloud Installation with rapberry Pi(Cloud is forwarded smartthings-phevctl) | Immediately | No | No | Yes | Yes | Yes | Yes |
| Сontrol over SMS without smartthings | 1-2 minutes delay | No | No | Yes | Yes | Yes | No |
| Local Network Installation(under NAT) | Immediately | Yes | Yes | No | Yes | No | Yes |
| Run without cloud and without Smartthings Hub | 2-5 minutes delay | No | No | Yes | Yes | Yes | Yes |
Cloud Installation
Without cloud installation
- control over SMS without smartthings
- Local Network Installation(under NAT)
- Run without cloud and without Smartthings Hub
Outlander PHEV Registration
- First need to register your phone on the original application Android or Apple or (Modified application)[https://github.com/vzakharchenko/remote-ctrl-gsm]
- start Smartthings-phevctl Server
- open server and enter your phone mac.
Installation Steps
- Install Server using Docker or raspberry Pi zero or Manual Installation
- create Device Handler
- create smartapp
- Configure smartthings application on android or apple
- Get "Smartthings Application Id" and "Smartthings Application Secret"
- Configure Server
- Add Smartthings devices
Server Docker Installation
- Install docker
sudo su
curl -sSL https://get.docker.com | bash
usermod -aG docker $USER
- Supported Architectures: amd64,x86-64,arm64,ppc64le,arm/v7
docker -d run --name=smartthings-phevctl -p 8080:8080 -p 8099:8099 -p 8098:8098 --restart=always vassio/smartthings-phevctl
or
echo "{}">/opt/remote-ctrl-gsm.json
docker -d run --name=smartthings-phevctl  -p 8080:8080 -p 8099:8099 -p 8098:8098 -v /opt/config/remote-ctrl-gsm.json:/opt/remote-ctrl-gsm.json --restart=always vassio/smartthings-phevctl
Raspberry Pi Zero installation
- Download Raspberry Pi OS Lite
- write the Raspberry Pi OS image to the SD card using balenaEtcher or analog
- write empty "ssh" and wpa_supplicant.conf files on sdcard (boot)
- install phevctl, node(>=12) and smartthings-phevctl
sudo su
apt-get upgrade -y && apt-get -y install build-essential cmake git python3-distutils
mkdir /opt/phevctl
cd /opt/phevctl && git clone https://github.com/papawattu/msg-core
cd /opt/phevctl &&  git clone https://github.com/vzakharchenko/phevcore.git
cd /opt/phevctl && git clone https://github.com/DaveGamble/cJSON.git
cd /opt/phevctl && git clone https://github.com/vzakharchenko/phevctl
cd /opt/phevctl/cJSON && mkdir build && cd build && cmake .. && make && make install
cd /opt/phevctl/msg-core && mkdir build && cd build && cmake .. && make && make install
cd /opt/phevctl/phevcore && mkdir build && cd build && cmake .. && make && make install
cd /opt/phevctl/phevctl && mkdir -p build && cd build && cmake .. && make
rm -f /usr/bin/phevctl
ln -sf /opt/phevctl/phevctl/build/phevctl /usr/bin/phevctl
curl -o- https://raw.githubusercontent.com/nvm-sh/nvm/v0.37.2/install.sh | bash
source ~/.bashrc
nvm install --lts
# You can go drink coffee)
npm i pm2 -g
env PATH=$PATH:/usr/bin pm2 startup systemd -u root --hp ${HOME}
pm2 startup -u root
npm i smartthings-phevctl -g
pm2 start `npm root -g`/smartthings-phevctl/smartthings-phevctl.js
pm2 save
Server Manual Installation
sudo su
apt-get upgrade -y && apt-get -y install build-essential cmake git
mkdir /opt/phevctl
cd /opt/phevctl && git clone https://github.com/papawattu/msg-core
cd /opt/phevctl &&  git clone https://github.com/vzakharchenko/phevcore.git
cd /opt/phevctl && git clone https://github.com/DaveGamble/cJSON.git
cd /opt/phevctl && git clone https://github.com/vzakharchenko/phevctl
cd /opt/phevctl/cJSON && mkdir build && cd build && cmake .. && make && make install
cd /opt/phevctl/msg-core && mkdir build && cd build && cmake .. && make && make install
cd /opt/phevctl/phevcore && mkdir build && cd build && cmake .. && make && make install
cd /opt/phevctl/phevctl && mkdir -p build && cd build && cmake .. && make
rm -f /usr/bin/phevctl
wget -qO- https://getpm2.com/install.sh | bash
env PATH=$PATH:/usr/bin pm2 startup systemd -u ${currentUser} --hp ${HOME}
npm i smartthings-phevctl -g
pm2 start `npm root -g`/smartthings-phevctl/smartthings-phevctl.js
pm2 save
Smartthings installation
Create Custom DHT
- open https://graph.api.smartthings.com/
- open your location/ or create a new one

- open "My Device Handler" and "create New Device Handler"
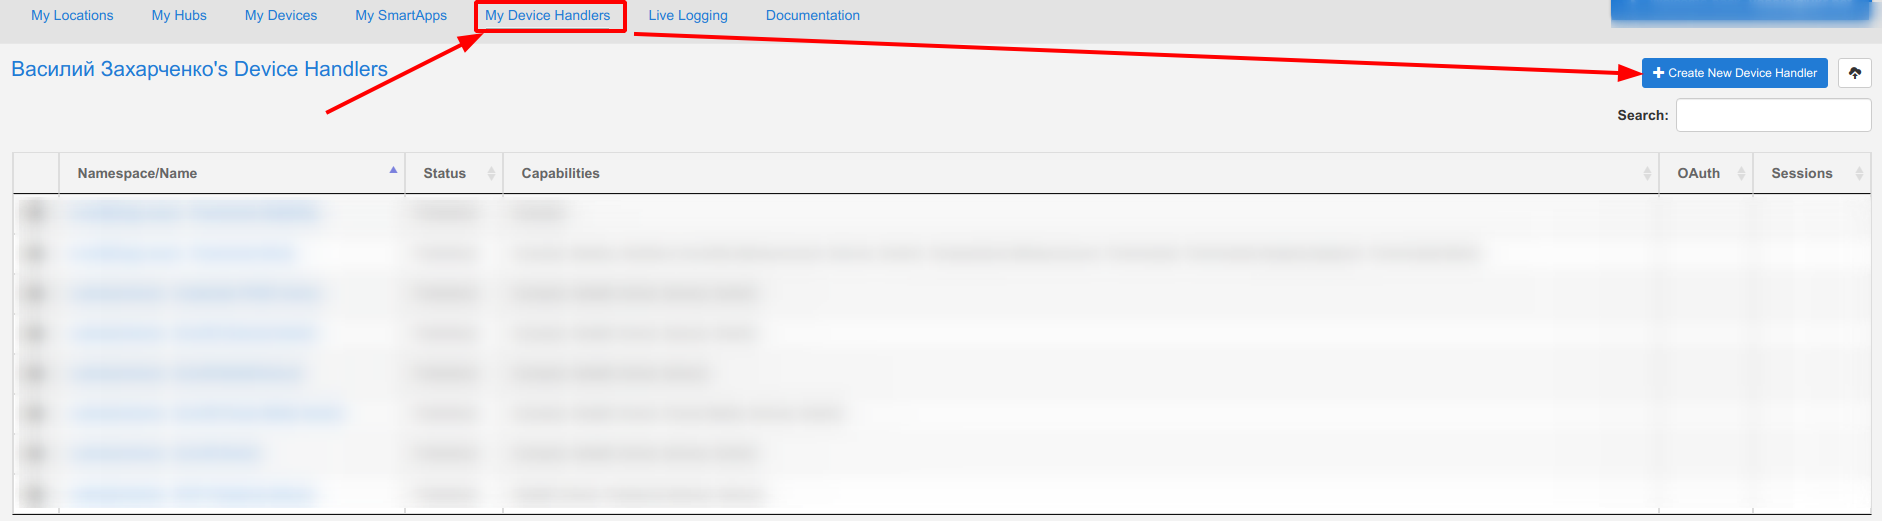
- select from code and add [Outlander PHEV Action.groovy](./dht/Outlander PHEV Action.groovy), [Outlander PHEV Battery.groovy](./dht/Outlander PHEV Battery.groovy), [Outlander PHEV Thermostat.groovy](./dht/Outlander PHEV Thermostat.groovy) and [Outlander PHEV Doors.groovy](./dht/Outlander PHEV Doors.groovy)
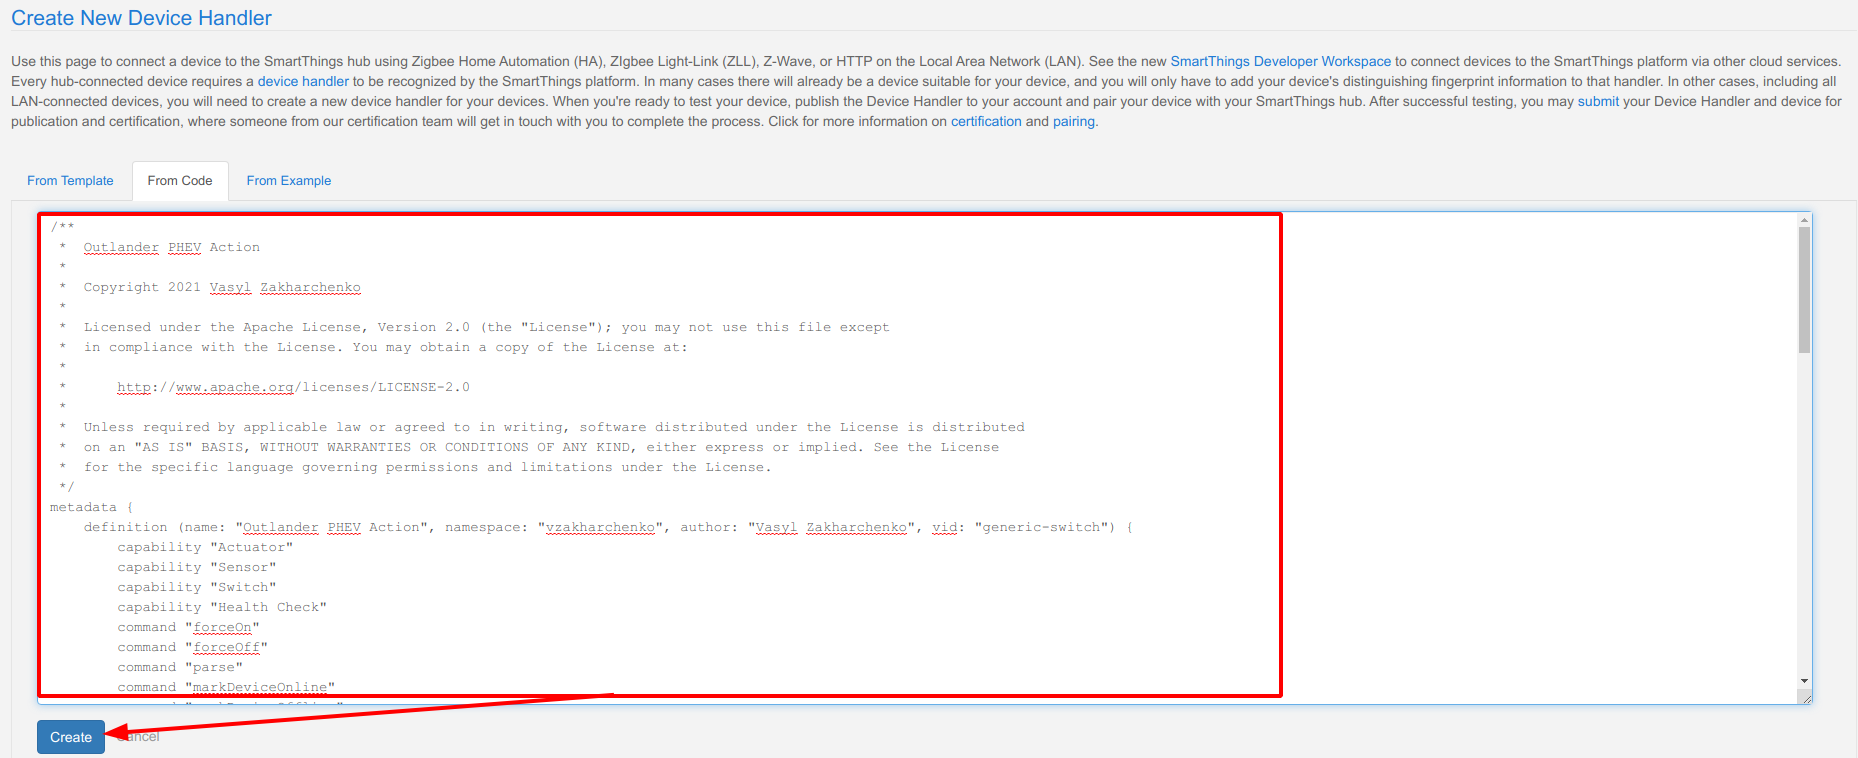
- click save


Create SmartApp
- open https://graph.api.smartthings.com/
- open your location
- create a new SmartApp

- select from code and add remote-ctrl-gsm.groovy
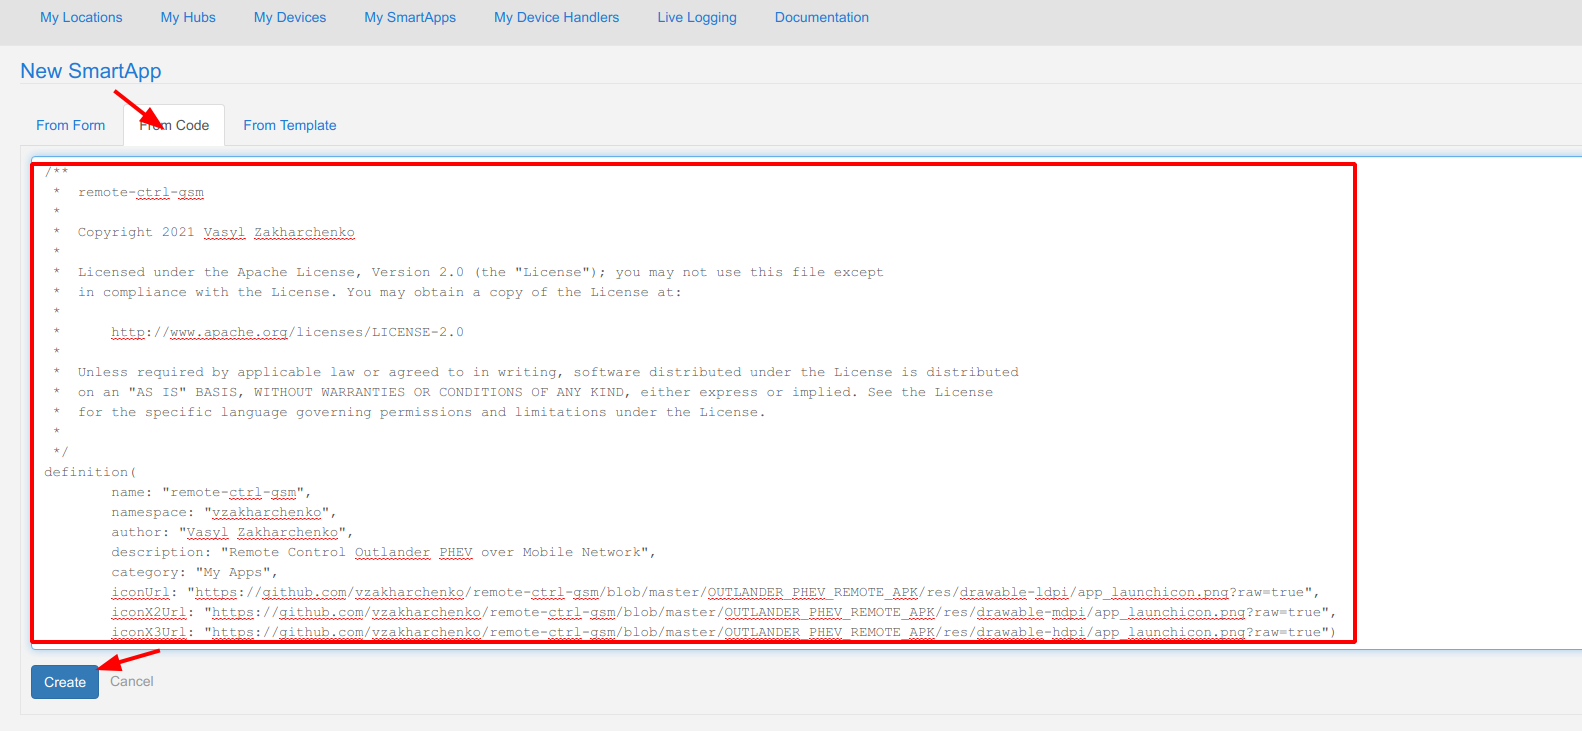
- open smartapp application and click "App Settings"


- enable "OAuth"

- Save and publish application


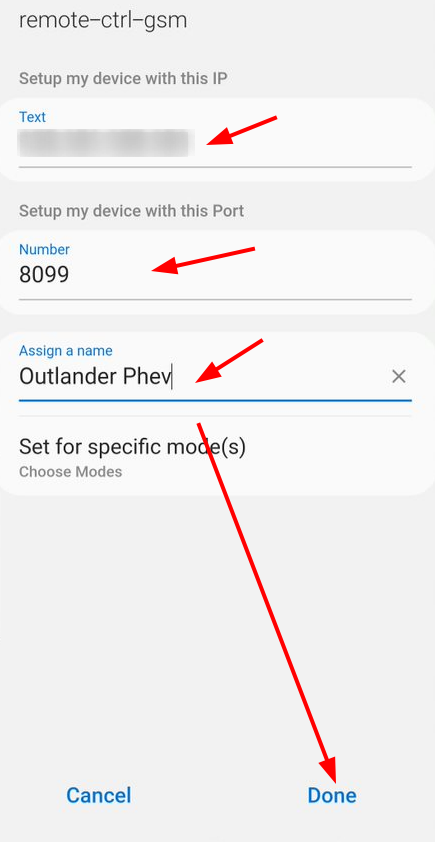
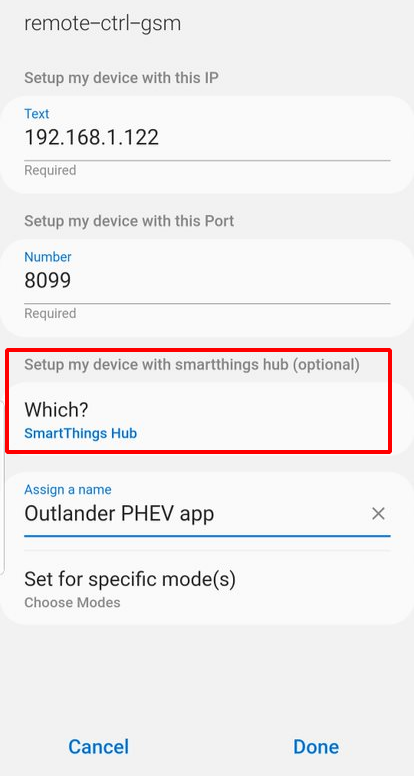
Configure Smartthings application
- open smartthings application in Phone Android or Apple
- select location
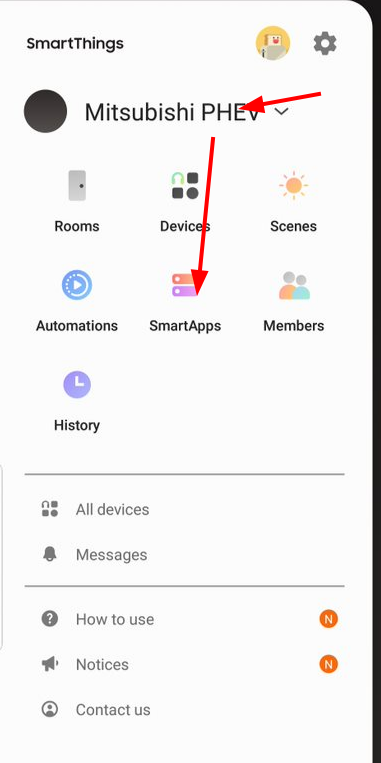
- add SmartApp

- add "remote-ctrl-gsm"

- set IP and port of server and click save


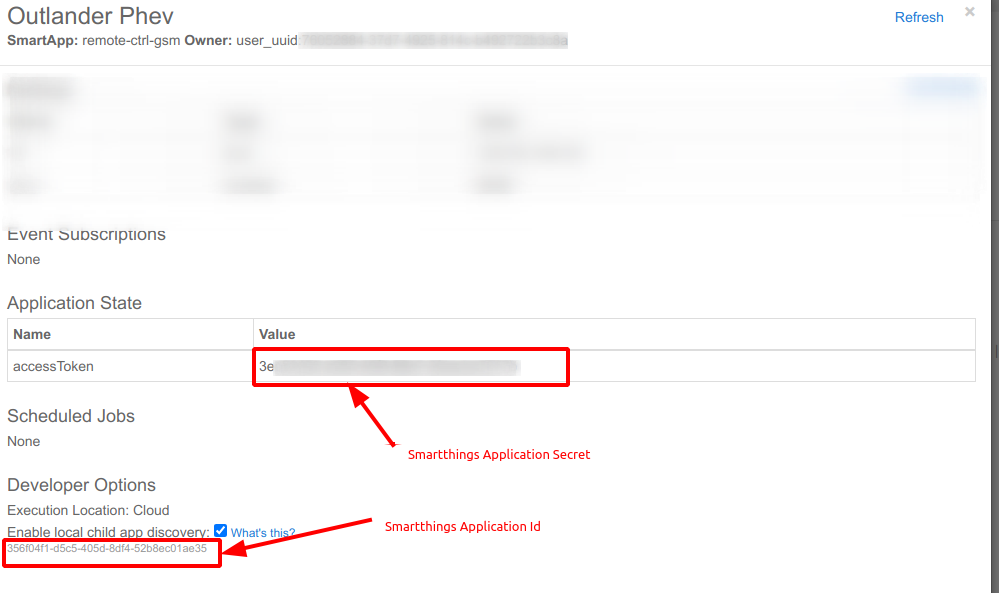
Get "Smartthings Application Id" and "Smartthings Application Secret"
- open https://graph.api.smartthings.com/
- select smartapps in your location

- select your smartapp
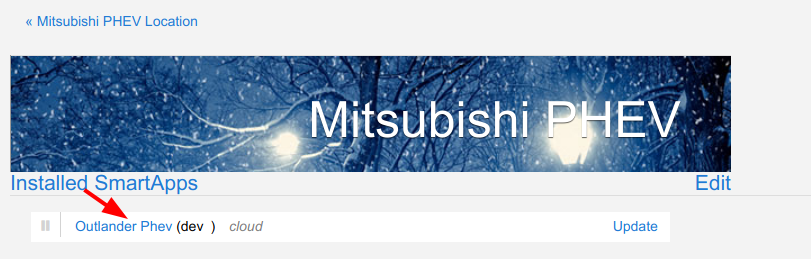
- get "Smartthings Application Id" and "Smartthings Application Secret" from the page


Configure Server
- open server
http://<IP>:8080 - default login/password: admin/admin
- configure "Smartthings Application Id", "Smartthings Application Secret" and mac address
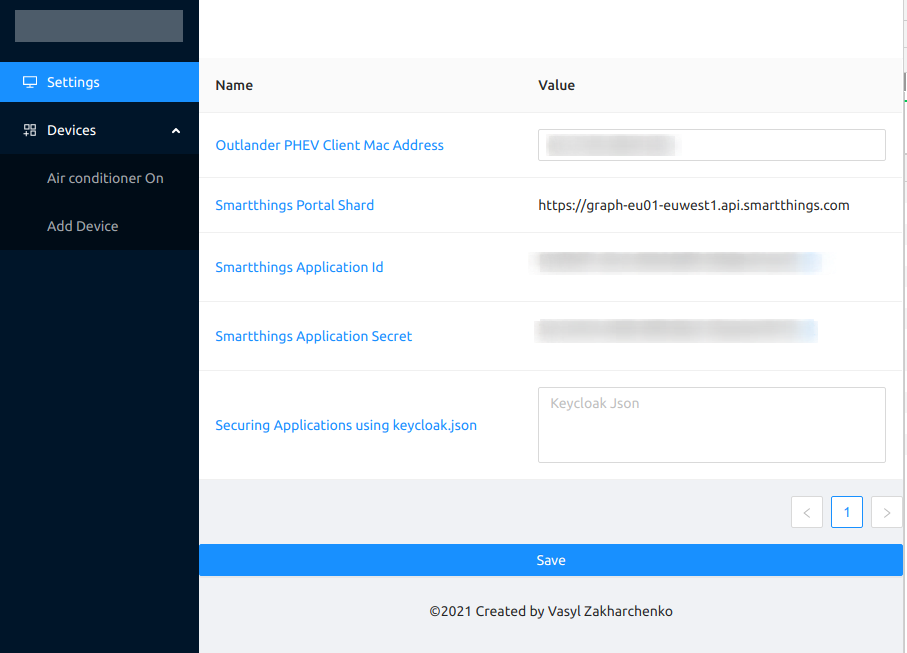
- click save

Add a new Smartthings device
- select devices->add Device
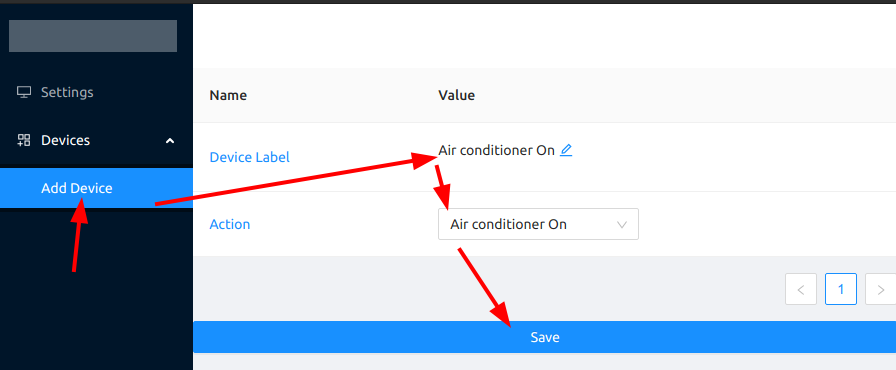
- Device will be appear om Smartthings App

Local Network Installation(under NAT)
- install [Smartthings Hub)[https://www.samsung.com/us/smart-home/smartthings/hubs/] on location.
- during installation smartapp select hub.

Run without cloud and without Smartthings Hub
- Configure Smartthings application without cloud and hub
- during installation smartapp select "Setup my devices without cloud".


Authentication
Local authentication (default)
default login/password: admin/admin
change password for user

add a new User

Keycloak authentication

restart Application
Keycloak authorization
 restart Application
Thermostat operation state


Push Notification


EVSE Electric Vehicle (EV) Charging Stations
Scripts for energy star charging stations

- Slow charging(slowCharge.sh)
curl --header "application/x-www-form-urlencoded" --request POST --data 'cur_set=7&charge_start=1&adaptive_mode_status=1&adaptive_mode_voltage=220&timer=0&timer_start=0' http://192.168.4.1/ajax
- Normal charging(fastCharge.sh)
curl --header "application/x-www-form-urlencoded" --request POST --data 'cur_set=16&charge_start=1&adaptive_mode_status=0&adaptive_mode_voltage=220&timer=0&timer_start=0' http://192.168.4.1/ajax
- Disable charging(disableCharge.sh)
curl --header "application/x-www-form-urlencoded" --request POST --data 'cur_set=7&charge_start=0&adaptive_mode_status=1&adaptive_mode_voltage=220&timer=0&timer_start=0' http://192.168.4.1/ajax
- Mikrotik Configuration
/interface wireless security-profiles
add authentication-types=wpa2-psk group-ciphers=tkip mode=dynamic-keys name=EVSE supplicant-identity=MikroTik unicast-ciphers=tkip wpa-pre-shared-key=<EVSE_PASSWORD> wpa2-pre-shared-key=<EVSE_PASSWORD>
/interface wireless
set [ find default-name=wlan1 ] disabled=no frequency=2447 mode=station-pseudobridge name=EVSE_CHARGER security-profile=EVSE ssid=<EVSE_SSID>

/interface bridge
add dhcp-snooping=yes fast-forward=no igmp-snooping=yes name=bridgeEVSE
/interface bridge port
add bridge=bridgeEVSE broadcast-flood=no edge=no-discover interface=EVSE_CHARGER multicast-router=disabled trusted=yes unknown-multicast-flood=no unknown-unicast-flood=no
/interface bridge settings
set allow-fast-path=no

/ip dhcp-client
add add-default-route=no disabled=no interface=bridgeCar use-peer-dns=no use-peer-ntp=no
add add-default-route=no disabled=no interface=bridgeEVSE use-peer-dns=no use-peer-ntp=no
add authorization for EVSE Charging
- start proxy application
npm i pm2 -g
env PATH=$PATH:/usr/bin pm2 startup systemd -u root --hp ${HOME}
pm2 startup -u root
npm i smartthings-phevctl -g
pm2 start `npm root -g`/smartthings-phevctl/evse-proxy.js
pm2 save
- configure evse-proxy
nano ~/.remote-ctrl-gsm/config.json
{
 "evseServer": {
  "/": "https://192.168.4.1",
  "style.css": "https://192.168.4.1/style.css",
  "es.js": "https://192.168.4.1/es.js",
  "ajax": "https://192.168.4.1/ajax"
 },
 "users": [
  {
   "id": "0",
   "username": "admin",
   "password": "admin"
  }
 ],
 "port": 8011,
 "role":"<KEYCLOAK_REALM>:<KEYCLOAK_CLIENT>"
}- Keycloak authorization example keycloak.json:
{
  "realm": "<REALM>",
  "auth-server-url": "https://<KEYCLOAK_URL>/auth/",
  "ssl-required": "external",
  "resource": "<CLIENT_ID>",
  "credentials": {
    "secret": "<CLIENT_SECRET>"
  },
  "confidential-port": 0
}
Keycloak security role:
{
 "evseServer": {
  ...
 }
 ],
 "role":"<KEYCLOAK_REALM>:<KEYCLOAK_CLIENT>"
}